A few years ago, while researching cheap costumes for a co-op theater class, I came across Paper Mask Making by Michael Grater at the library, I used it so much, DH bought me a copy from Dover for my birthday that year (we probably should have swapped it for the library’s copy to be fair ;-) This was great for us as we enacted Ananci stories, (or trick or treaters, if you do Halloween, we do, it’s one of our few chanced to meet the neighbors).
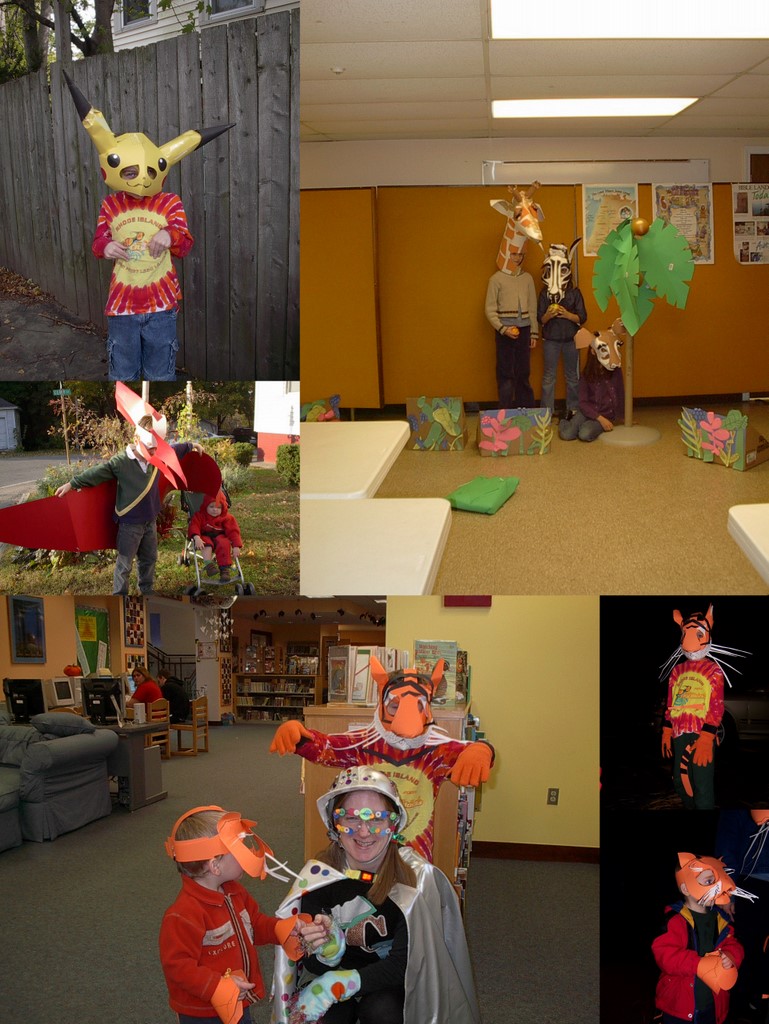
Here are some examples I’ve made from this book (and a few variations of my own)
I made this collage last night to encourage myself that a two headed dragon was not too crazy. Because it’s been a few years since I’ve made a mask this way. So far I’ve got the lower head piece (think upsidedown pair of pants with hole for face and shoulders) and the base of the dragon heads up on the necks.
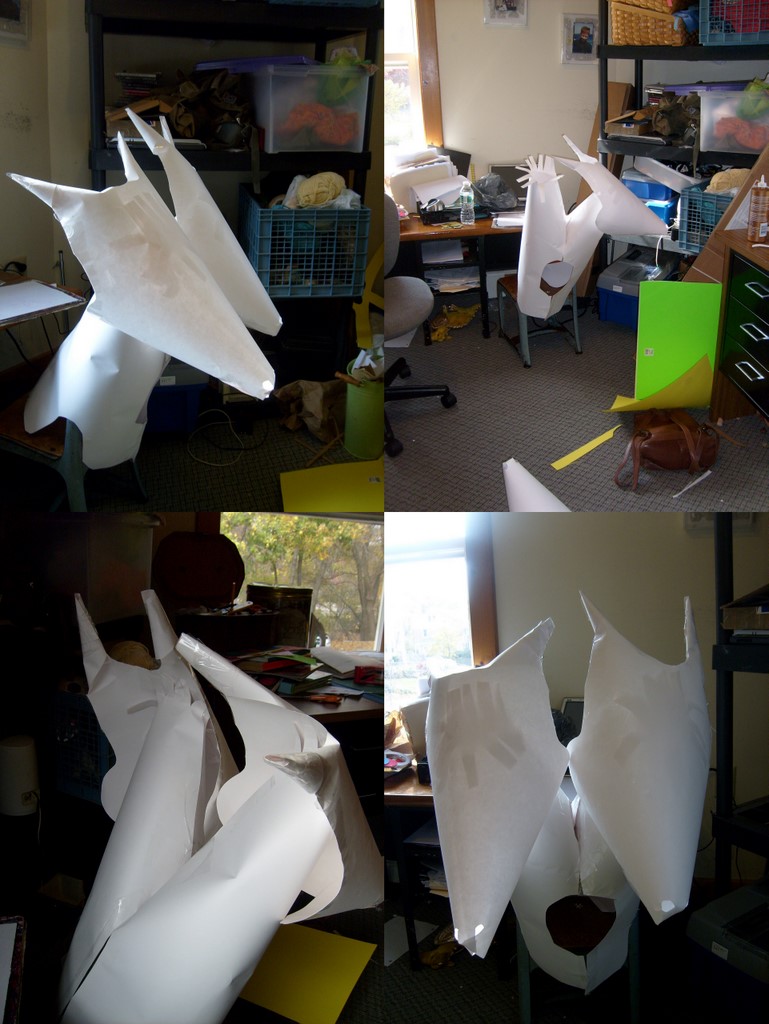
See how you make slices in a cone to have something to attach another piece to?
K’s head will be different, I’ll be basing it on a deer head, so she can see through the cheekbones. M will see through the chest piece.
In deciding what the dragons should look like, the drawings of Abigail L. Hamaker were especially helpful last night, also Janny Wurts. I love Couriers!
If you are making an animal not in the book, line drawn illustrations are helpful, especially things that show the skull structure. Photos are helpful for adding detail at the end, but they are so fluffy with fur and whiskers that they aren’t so good at the beginning, at least with my eye. When you see a skull drawing, you realize that a deer head is like a zebra head, like a horse head… only with different proportions and ears. Then you can pick the head from the book to start with and adapt. Cones come up all over the place for tusks and horns. Whiskers and eyelashes can be made by fringing a piece of construction paper, then curling it with the edge of a scissors like you’d curl ribbon on a birthday package.
The real personality of the mask is in the eyes, the setting, size and brows. If something just doesn’t look right, fuss with the eyes. All sorts of packaging bits can be useful in decoration, if you have any see through acrylic scrapbooking bubble stickers, they can add dimension and shine to eyes, so can a built up layer of Elmer’s glue.
I use my exacto knife for most of the cutting on my self healing mat – it’s a little like drawing. My hands would get really tired with scissors, but if you don’t have carpal tunnel syndrome like me, and you like scissors, you should be fine.
I find that one sheet of white poster board is right for the under-mask. I don’t glue up the back though – I over lap the bands, and fold the over the head piece, then secure it with a bull-dog binder clip. If any of your cast has curly hair, it is like little springs slowly making the mask rise up off the head – and the size of the child’s head changes with hair style and humidity! So, you really, really want adjustability. Also, if you are using packing tape, make sure there is no sticky bits inside, hair can get stuck (and kids will cry). Aileene’s tacky glue is great, clamp it with bull dog clips or laundry pins while the glue dries. Hot glue works too, but watch your fingers!
I’ve never done this WITH children – only for them, although I do include them on the reference search, and sometimes painting or markering the final features. If anyone has actually done it with kids, I’d love to hear about it, of course, if anyone has done it for kids, I want to see the URL of the photos too!
I’ll post my kids’ photos Sunday night or Monday – right those poor dragons don’t have any eyes yet. The TARDIS is blue though.
So cool!
Wow. Impressive. My favorite is the tiger one. I’m going to check out the book link now.
I imagine you and Sprite would enjoy that book.
My name is Zuescroft, and I just adore these magestic helmet masks. I am so blessed to have come across these while googling milk jugs on the internet.